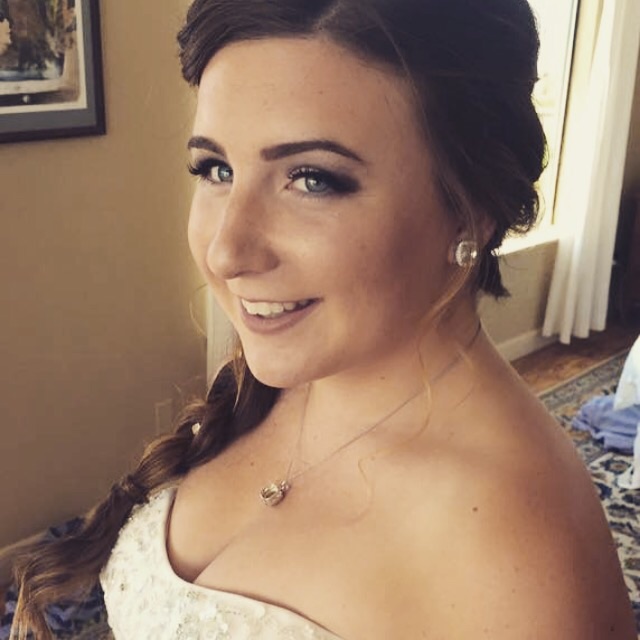
Makeup By Heather

Makeup By Heather
Self taught makeup artist. Special Effects Makeup is my favorite but my skills also include Bridal, Prom, Everyday and any Occasion makeup.

Saturday, July 25, 2015

Makeup by me

So, I have been so busy I haven't had time to get on here every time I had a makeup look I wanted to share with you all so I figured I'd do one big post and put them all on here :)  I've had a few makeup jobs lately so here's the results.....


My long time friend just started Cosmetology school and they are having themed days so she asked me to do a baseball mask for sports day and Sally makeup from the movie The Nightmare Before Christmas so here are the two looks.


I've been wanting to play around with highlighting and trying to get some costume makeup more 3-D and realistic so I practiced this black masquerade mask on myself.  I was really happy with how it turned out!!


Saturday, June 27, 2015


So a few nights ago I was in a mood to play with my costume makeup that I hadn't touched for awhile because, well it's not Halloween, and that is usually when I use it.  So I pulled it out and wanted to do a no mouth/speak no evil type of deal and.........it totally sucked. That is the picture right under this text.  I was frustrated and annoyed because if I had been practicing more I would of probably nailed it.  I ripped it off (it was just latex and toilet paper) and was going to just jump in the shower and give up but then I decided to try again but do a zombie look because zombies are my specialty during Halloween time and I am ALWAYS trying to improve them (have a big new plan to try out soon for a different type of zombie look).  I am doing a big photo shoot next month where I will be doing zombie makeup, regular dirty looking people that are running from zombies and also photographing the whole things myself......going to be a big job but I think I am the best at zombies so I want to highlight it and then put the photos in my portfolio to show people during Halloween. 


So this is the zombie look that I came up with, I had already posted some darker creepier pictures of this but I decided to show a brighter one where you can see the colors and details better.  I did an opened up rotting jaw and two wounds.  I was going for a nasty infected look so I did the veins coming off of each wound to give a "the infection is spreading" type of thing.  I usually do my zombie wounds much darker but because I was going for a rotten infected look I decided to put a lot of yellow and green in the surrounding skin of the wounds.  I took the veins down my neck but cut it off there.  I was surprised myself with how good this turned out.  It was one of the best zombies I've done (besides the one I did on my husband where he was missing an eye lol).  It gave me a lot of much needed confidence for the shoot next month.  What I love the most about zombies is that every single one I do is never the same, I try sometimes to replicate exactly what an old one looked like but they always turn out just a little different and unique.  

Thursday, June 25, 2015

Zombie Makeup


 Hadn't touched my special effects makeup for awhile so I decided to play around with it a couple nights ago and I have to say, this was one of the best zombie looks I've came up with.  I was going for a nasty infected wounds type of zombie with the veins coming off of all the wounds like the infection was spreading.  I used the Ben Nye Zombie Wheel to create this look as well as liquid latex, toilet paper and some eye liner.  Super easy and quick and turned out amazing!


My first on site bridal makeup job

 The beautiful bride.  She wanted a smokey plum eye look with winged liner and false lashes so this is what we came up with at her trial and then I re-created it on site for her wedding.  
 One of the Bridesmaids, she wanted something colorful and bold with some false lashes.  I was only there to do the brides makeup but I had some extra time so I helped the bridesmaid and the sister of the bride with their eye shadow.  
 Here's a closer look at the bridesmaid's makeup.  These girls were great to work with, fun and they were loving all the makeup tips I was giving them as I did the makeup.
 Sister of the bride and the bride.

I was so busy doing the makeup so I was so appreciative that the mother of the bride got a shot of me doing the makeup.  Hard to get these kind of shots when your hands on doing makeup the whole time, usually my husband photographs for me during the makeup process but he was busy so I was glad that she got the photo for me!!

Saturday, July 19, 2014

Gluten free makeup products

So I have had some reactions to makeup containing gluten lately so I have been doing tons of research on what gluten is listed as on makeup, lotions, body wash, etc. and I wanted to share the products that I have found in case anyone else is having trouble finding them or knowing what they are. 

I e-mailed Urban Decay and they told me to list every product that I own and they would confirm if it has gluten or not, I asked about all three naked palette's, the electric palette, vice palette (1&2), single eye shadows, primers, lipsticks,  and the super saturated high gloss lip colors and lastly setting spray. 

Their response was: 
Hello Heather,
Thank you for your email reply. All shades in the palettes are gluten free EXCEPT the Electric Pigment Palette.  The primers all three shades are gluten free but the Anti-Aging one is not. All Super-Saturated shade do have gluten. And lastly, the setting sprays are all gluten free.
Please note the gluten ingredient name is tocopherol. This will be listed in the ingredient list so you can review the list and find out for future items.
If you have any further questions, please feel free to reply to this email.

I then had to reply and ask about more products that I forgot that I had from them which were:  brow box in honey pot, shattered face case, Theodora palette, lip gloss and the dangerous palette.

It's the weekend so I haven't gotten a response from them but I know that their brow boxes use to be gluten free so that one I just wanted to confirm and as far as I was aware Urban Decay has no eye shadows that contain gluten just the pressed pigment palette (electric palette). But it's good to confirm because products change so much. I also know that all of the 24/7 eye liners contain gluten. Their liquid liners, ink for eyes cream eye liner and heavy metal glitter liners are all gluten free. Surreal skin mineral makeup, razor sharp ultra definition finishing powder, de sick in a tube, lip love honey infused lip therapy, body bronzer, body shimmer and  sparkling lickable body powder are all gluten free as well. 

I will update this post with their response when I receive it, most likely Monday. 


Elf e-mailed back quickly and responded:

Thank you for your interest in e.l.f. Cosmetics. Our products do not contain gluten or beeswax. Please be aware, however, that we cannot guarantee that the machinery used to process our products are completely gluten free.


The only product I asked Benefit about was their porefessional and it is gluten free. 


Too Faced Naked Eye palette is the only thing I own from them and it is gluten free. 


Mac's gluten free products are: Studio finish matte fondation, lipglass, lipsticks except for the amplified creme lipsticks, eye shadows (contain soy), fix + (contains soy), fluidline, frost lipstick (contains soy), full coverage foundation, glaze lipstick (contains soy), green gel cleanser (contains soy), lustre lipstick (contains soy)
lustreglass (contains soybean extract), matte lipstick, plushglass (contains soy), powerpoint pencil (contains soy), satin lipstick (contains soy), select spf 15 foundation (contains soy), select spf 15 moistureblend foundation ( contains soybean oil), select sheer loose powder (contains soy), select sheer pressed powder (contains soy), sheertone blush, studio finsih concealer, studio finish pressed powder (contains soy), studio fix fluid foundation (contains soy), studio fix powder plus foundation, studio mist blush (contains soy), studio mist foundation, studio tech foundation (contains soy)

Products containing gluten:
tinted lip conditioner
amplified creme lipstick
day spf 15 light moisture
fast response eye cream
pre + prime skin


I have read on a gluten free blog that mac's paint pots are gluten free but tocopherol is one of the ingredients to I need to confirm that with mac. 

shattered glass face

 This was my first attempt at making a "shattered glass" effect on my face and I wasn't all that happy with it, came out a little bit too spider webby.


This was my second attempt, I have a steadier hand on other people sometimes so I decided to use my husbands face and I think it turned out better this time. I was able to get the  thinner and all in all I just liked it much better!!! yes I have been posting so many makeup looks lately but I have been dreaming makeup every night, all day all I think about it makeup, I see random people and tell my husband "omg I wish I could do their makeup, I'd do it......blah blah blah" haha I am obsessed......I am starting cosmetology school soon so I am very excited to do that!!! I have done freelance makeup for awhile but it would be nice to add more skills to my list! Someday I hope to do some bridal jobs (once I learn hair, who hires a separate hair and makeup artist now days when they can find one that does all???? duh!!!) Anyway I am very excited, my husband watches me do makeup in awe and it makes me feel even more excited. Once I start school I'm sure their will be sooooo many more posts!!! Stay beautiful and smile!


Follow me on instagram: http://instagram.com/aidensmomyo

colorful eyes using Urban Decay Vice palette!!!


So I had attempted to do a shattered glass effect on my face the other day and got some comments on my eye makeup (because I didn't take a pic before doing the costume makeup) so I decided to recreate it. The only difference this time was no false lashes because I had to run errands and I thought all these colors were pretty out there enough to not add lashes in the day time lol. Also I used Mac's lipstick in Hue on my lips because in the other pic I had used Urban Decays super saturated high gloss lip color and had a really bad painful reaction, I e-mailed them and asked about ingredients and it contained gluten which I am allergic to so I can no longer use them on myself. 


The little bump on my eye is also from using something with gluten in it :( ugh sorry. I wanted to post this so bad so I just did it anyways with the little bump and all. Don't worry I went thru every single product I own last night (which took me like 3 hrs!!!!) ugh and put everything containing gluten or soy in it's own drawer so I know not to use them on myself. I didn't think gluten and soy could affect my skin so that's why I hadn't done it sooner. 


All eye shadows are from the Urban Decay Vice Palette (which is gluten free), liner is wet n wild liquid liner in black, mascara is makeup forever smoky extravagant also in black. Brows are Urban Decay brow box in Honey Pot (gluten free). The primer I used was Mac's painpot in painterly which i'm not sure if it contains gluten or not so I will be calling them on monday to confirm this products as well as their mineralize skin finsh in soft n gentle. 


Face is Benefit's Porfessional primer (gluten free), Sonia kashuk liquid perfecting foundation (not gluten free :() Studio finish concealer in NW 20, ben nye translucent powder,  wet n wild pressed powder (gluten free), elf blush and bronzer. (no elf products contain guten.)


I will post a list of every single item that I have confirmed gluten free by the manufacturers. Urban Decay has been the most helpful so far, they will tell if there is gluten in ANYTHING and they respond super fast. I also have a list of a few gluten free Mac products but as I said earlier I need to confirm a few more that I own. I hope you guys liked this look, I didn't edit any pictures because I thought the colors came thru pretty good and didn't really see any need to edit them. Hope you all have a beautiful day and remember to smile.

Follow me on Instagram: http://instagram.com/aidensmomyo

Monday, June 30, 2014

Purple Lips Rock My World!


This purple lip stick is on of my ultimate faves when I am craving something fun and colorful that isn't hot pink :) I get these lips by using mac's matte lip stick in Heroine (Dark Purple) then add mac's viva la glam nikki 2 lipglass (light purple) over top to give it that beautiful glossy finish. Definitely two of my favorite lip products from Mac, but if you know me, you know that I have a whole drawer of Mac lipsticks I just love the way they feel, look, everything!


Sunday, June 29, 2014

half split face

 
So, I had no flippin idea what to call this one. I wanted to practice with my Scar Wax for people that are allergic to latex or just for small wounds, etc. Wanting to see what it's like, texture, how easily blend able and all that jazz....so it's actually a little difficult of a product to work with because of it's stickiness. I would put one little section on and then add another and the previous section would try to come off onto my fingers and I'd end up putting it back on but as far as blend ability it was great. I am still definitely a fan of liquid latex just because, for me, personally, it's is a very easy product to use. Although liquid latex isn't blend able once it's dry you can add little spots around whatever it is that you are making to make it blend into the skin more naturally. It's what I have always used so that is probably a good reason why I find it easier. I was inspired to do a (half gruesome face) and this is what I came up with, not too gruesome after all but I loved it. Well this is it, I used a combo of ben Nye monster, bruise and zombie wheel for the nastier parts and face. For the eyes I used a matte black shadow from nyx and a sheer green eye shadow from Urban decay, liquid eye liner for the "branches" and elf dramatic lashes. 


On the prettier side I used, Porefessional face primer, Sonia Kashuk liquid foundation in Buff Chamois 04, Ben Nye neutral set powder, Wet N Wild pressed powder in Medium/tan, Mac Studio Finish Concealer in NW20, Mac paint pot in painterly, 24 hr color tattoo in Barely branded 70, eye shadows used were the naked 3 palette and lorac pro palette, eye liner is wet n wild liquid eye liner in black, Makeup Forever smoky extravagant mascara (Best mascara EVER!!!) And lips were mac's viva la glam nikki minaj lip stick. ohhhhh wait....almost forgot brows!!! lol What I use for my brows are a taupe eye brow pencil and then I set it with Urban Decay's brow box in honey and I use the darker powder in it.


Well there it is!!! I am hoping to post some how to "brow" pictorial soon!!! maybe I'll remember to photograph it tomorrow as I do my makeup!!! Hope you all enjoyed! Follow to see what else is to come!!! Stay Beautiful, Muah!!!!

Sunday, June 22, 2014

Makeup By Muah!!!!

 Hello Beauties!!! I am back to this blog and updating everything. I posted a Halloween post so I hope you all loved all the looks, there will be way more to come as far as costume makeup and just everything else!!! I have been soooo makeup inspired lately so I have been doing makeup non stop different looks different days so I will keep posting as I do them!! No I will not be posting daily selfies lol but when the makeup is spectacular I probably will :) So here's some looks I have to post!!!


My beautiful niece wanted a more formal look!! 


Silver eye look.


One of my favorite looks, Golden eyes and red lips.


Everyday Neutral Eye.


When it comes to lips, Mac is my go to because of their beautiful colors!!


Mac lipstick in Girl About Town!!! My favorite hot pink!!!


This should of been in the "Halloween" post but I figured I'd just throw it into this one :) Purple eyes and lips with some glitter pressed onto the lipstick, definitely costume makeup but I thought it was beautiful just the same. 


I have been so makeup inspired as I said earlier so my makeup has been different more than it's the same and this was one of my favorite's as well. I used urban decay's star dust eye shadow (sparkly purple color) and I am in love.....ugh so amazing!!!

Halloween Makeup By Muah!

So I have always had a major love for makeup, but I have especially had a love for going any kind of Halloween gore and even pretty Halloween makeup. So here's a preview of some of the looks I have done thus far.

 
This was my version of Sally from Nightmare Before Christmas!
 

I am always doing a ton of different variation of zombie so this was one of them! #keepthatzombiegamestrong!!! haha


My pretty/prom Zombie (disappointed that I didn't color my neck on these :(()


One of my versions of a vampire. Will be doing an updated on soon!!


Zombie!!!!!


Male missing eye zombie!!


Spider web eyeliner Witch look.


Killer Clown!


Opened Jaw!!! Loved this one!!!
 
 
So those are the look that I have to post as of today, I will have many more coming! I have completely restarted my makeup kit as well as all Halloween makeup because I wasn't happy with some products that I used last year so the last few looks were done using all new products and I am very happy with all of them so far. I will be doing tons of more looks, trying to get a good portfolio going before Halloween hits this year so I will post everything as I go. If anyone has a request for a look or products used just comment and I will answer as soon as I can!!! Thanks everyone for checking out my page and my post!!! Stay Beautiful!!!


Monday, February 28, 2011

Tutu Tutorial

So one of my friends asked me how to make tutu's so I thought I'd try to do alittle tutorial on here. I'm not sure how good it'll turn out since I can't do a video but here we go :)

You will need 5 yards of Tulle for each layer that you chose to do. If you buy it by the yard the way I cut it is to take each yard and roll it into a thin roll and then go down the roll and cut it into 4 inch sections.

Step One: Measure your little girl.

 Step Two: Measure out your cloth ribbon, you want to measure out the amount you measure above plus 10 extra inches. You mark it by measuring the amount you measured above plus two, mark each end leaving and extra 4 inches on each side so you have room to tie it around your little girls waist. I do 4 inches but you can always do less or more depending on what you want.
 Step Three: Once you've marked your cloth ribbon make a knot in it on each of the spots you marked. Then take your Tulle and loosely wrap it around 2-3 fingers, whichever is more comfortable for you.
 Step Four: put the cloth ribbon in front of the Tulle that is wrapped around your fingers.
 Step Five: take each sting of tulle that is hanging down and pull it up over the ribbon and put it thru the loop that you made around your fingers. Both ends should be coming out of the back of the loop. Pull slowly to tighten the tulle onto the cloth ribbon.
 Once pulled Tight it should look like the above picture :) Keep going until you have Tulle covering your cloth ribbon to the other knot. If you are doing a multi-colored tutu it's easier to see the colors if you do at least 2-3 of each color before switching to the next.
 This is my finished layer of my tutu. you can leave it like this or do another layer and attach them. I will post later and tell you how to attach a second layer.

 I added little white flowers along the top but only on the black tulle. You can add whatever you want, I also have done a lot of tutu's where I place the flowers all over the layers so it looks like the flowers are just flowing on the tulle. You can also add glitter depending what age child it's for and what they are using it for.